Our basic stapler-style slot puncher is a highly-versatile office tool. Its rubber-like base not only prevents the slot punch from moving along a desk or table top while in use, but it can also be easily opened or removed to empty waste. The slot punch comes with an adjustable metal guide that guarantees the same punch placement every time for larger projects. Since it’s so small and light, it is extremely portable, making it excellent for on-demand punching!
Use this handy tool for punching laminating pouches for ID badges, credentials, VIP/backstage passes and more! Once any one of these items have a punched slot, a lanyard, badge clip, or clear plastic loop can be attached to make it complete.
Both the slot punch‘s open punch throat and removable metal guide allow it to be used for quick, handheld applications. For example, you can punch slots in the center of the top edge of a gift bag, then tie it with a satin ribbon as an alternative to handles; or punch two slots on each side, then tie on your own handles for a unique, highly-customized look!
If you use this slot puncher another way, we’d love to hear your creative ideas, too! Please leave us a comment and share your ideas with us.
Letter-sized cardboard carriers (9-5/8″ x 12-3/16″) for laminating pouches offer a shortcut for high volume laminating projects that involve smaller-sized laminating sheets. Instead of feeding business card- or bookmark-sized laminating pouches into a pouch laminator individually, multiple pouches can be placed within a single letter-sized carrier and subsequently be fed into the machine. The carrier sheet not only spreads heat across its contents, but also cuts down production time significantly.
Each box thermal laminating pouches that we sell includes cardboard carriers; however, if you need additional carriers, we do sell them individually in a variety of sizes – including some that are even larger than letter-size.
Note: Not all pouch laminating machines have enough clearance between rollers to accept both a carrier and a pouch. Be sure to check your machine’s specifications or ask us within the comment section. This shortcut is easily performed using laminators with a throat measuring 9″ or wider.
If you have more questions about laminating or using carriers with your projects, ask us within the comment section – we’ll give you an answer!
Where do you turn when the classic “Hello, My Name Is” label isn’t strong enough to withstand an event on its own, or when a name tag pinned to a person’s shirt or coat is likely to come off or get lost? An excellent solution is to attach a name badge to a lanyard!
Lanyards can be as simple as plain, round, shoestring-style cords with swivel hook attachments or as elaborate as custom-printed ribbons with specialized clips. Lanyards are worn around an attendee’s neck, allowing the attached badge to hang freely without damaging garments.
For the badge itself, here are some options:
Thermal Laminating Pouches – If you’re planning to make hundreds of tags, thermal laminating pouches are not only the most affordable way to produce your name badges, but they are also the fastest. Laminating pouches are available with pre-punched slots or can be punched before or after lamination using a simple, stapler-style slot puncher. For added durability, you can also add a brass grommet using a hand-held eyelet punching tool.
Self-Laminating (Cold) Pouches – If you’re making a small number of name tags for an event, consider self-laminating pouches. These pouches are also referred to as “cold laminating pouches” because they do not require a thermal pouch laminator to activate. The interior of each pouch has one side coated in adhesive (protected by a release liner prior to use) and one side that is plain clear plastic. Self-laminating pouches can also be punched. We only recommend these pouches for small events because this type of badge takes longer to assemble than those made from thermal laminating pouches and have limited size and thickness varieties available.
Plastic Badge Holders – If tags need to be interchanged for an event, then plastic badge holders are an excellent option. Plastic badge holders come with one open end at the top, allowing paper tags, identification cards, or business cards to slide in and out freely.
Rigid Plastic Badge Holders – This type of badge holder is designed to provide added protection to an already laminated name badge. They can either hang vertically or horizontally and are available in multiple colors. Rigid plastic badge holders can be used multiple times, so they are ideal for use at monthly meetings or sporting events.
If you’re looking to make several name tags, backstage/VIP passes, or credentials for a large event and would like personalized recommendations, feel free to ask us – we’re always happy to help!
The mental image that is frequently associated with laminating involves a large machine loaded with rolls of laminating film, into which a project is loaded and exits encapsulated. These roll laminating machines are commonly found in schools and commercial print shops. However, laminating can also be done on a much smaller scale using what are called laminating pouches: pre-cut sheets of laminating film that are sealed on one edge that are then run through a small machine about the size of a household toaster.
When it comes to projects with 13″ as the shorter dimension, one must decide to use either a pouch or roll laminator. Here is how project aspects of laminating using either pouches or rolls compare:
Machine Investment
Pouch laminating is convenient and portable. Pouch laminators often accommodate projects as small as an ID badge or as large as 11″ x 17″, so long as the shorter dimension can fit within the throat of the machine; pouch laminator prices range within hundreds of dollars. Roll laminators can be as small as 12″ or as large as 60″; their prices range within thousands of dollars.
Material Cost
For a project with a minimum dimension of 13″, pouches with the closest shorter dimension would either be too small (12″) or too big (15″). Pouches can be custom made, but do cost a bit more than popular pre-made sizes. Roll laminating film, however, is sold in 27″ widths, which fit two 13″ projects side by side. The total project cost would fluctuate depending on the number of items being laminated at a time and which thickness or texture of film is chosen.
Laminating Speed
Due to their compact nature, pouch laminators have smaller rollers. In order to increase laminating speed, one must select a machine with multiple sets of rollers. For example, a 6-roller machine is much faster than a 2-roller machine. The diameter of a roll laminator’s rollers is much larger than that of a pouch laminator and can laminate feet per minute as opposed to inches.
The Final Touches
Laminating sheets are precisely cut to desired dimensions and the corners are rounded; the only trimming necessary for a project is for whatever is inserted into the pouches; once an item is laminated, it’s finished. Roll film projects not only require trimming, but they also require the corners to be rounded if desired.
If you would still like more information to help you decide which process is more suitable for your project needs, please ask us within the comment section.
For a limited time, Lamination Depot will make two of your personal business cards into luggage tags for free.
Simply mail us two of your business cards and include a self-addressed, stamped return envelope. We will thermally laminate your business cards in a durable 10 mil luggage tag laminating pouch. We will include two clear luggage loops that will enable you to attach your new luggage tags to your luggage, briefcase, backpack or any item that you want to identify. These professional looking luggage tag laminating pouches will last for years and provide easy identification of your personal items.
To claim your free luggage tags, mail two business cards and a self addressed, stamped return envelope to:
Lamination Depot Inc. Attn: Free Luggage Tag Offer 1505 E. McFadden Ave. Santa Ana, CA 92705
One first class postage stamp will be adequate for the return postage.
Allow 14-21 days for processing and receipt of your your new luggage tags compliments of Lamination Depot Inc.
This offer is limited to only two free luggage tags per person. Additional luggage tags may be purchased for $2.50 each plus return shipping.
Customized binding covers make documents stand out and appear more professional. One of the most frequent and relatively inexpensive ways to achieve this look is to print a design onto the front sheet of the document (on either the same type of stock used for the whole document or something heavier) then add a clear binding cover to protect it. Clear PVC binding covers come in 5, 7, or 10 mil and are offered in a variety of sizes – 8-1/2″ x 11″ covers that are flush with the edges of a standard letter-sized sheet of paper, 8-3/4″ x 11-1/4″ covers with round corners to protect the square corners of letter-sized books, 9″ x 11″ covers to accommodate letter-sized documents that include tab dividers, 8-1/2″ x 14″ covers for legal-sized books, and 11″ x 17″ covers for tabloid-sized (double-letter) books..
An alternative to using a clear PVC cover for a bound document is to laminate the printed design, which eliminates having to flip the clear cover as if it were an additional page in the document. This process can be as simple as inserting the printed page into a laminating pouch and then sealing it with a pouch laminator or encapsulating it using a roll laminator. If you would rather have one side of the cover laminated and the other side exposed (for writing an inscription, etc.), you can laminate the design using nylon “lay flat” laminating film which does not curl after being applied; however, due to the price per roll and investment in the specialized machine, this process is most often used by professional printers and graphic artists.
If you would like a recommendation for a machine or supplies to used to create your custom cover or for another project, please ask us within the comments section – we’re happy to share our knowledge with you and get your project rolling!
Adhesives interact with paper and ink toner coverage differently. When selecting laminating film, it is important to note the film’s content ratio: when the ratio of film and adhesive are combined, they equal the film’s total thickness. Film that is made with stronger adhesive provides better adhesion, and often uses a lower melting temperature than more basic adhesives. A higher ratio of film to adhesive provides a thicker finished result and increased clarity compared to films that have a high adhesive content.
Below are some common scenarios with the recommended type of film to use for each:
“I am laminating standard copier paper with light ink coverage.” Standard 20 lb. copier paper is a porous material that can be laminated with standard laminating film, including the school-grade laminating rolls commonly used by schools. Light ink coverage, such as the amount used on text-based documents with simple illustrations, provides the best base for laminating with standard-grade film.
“We are a school that laminates construction paper projects.” Construction paper generally has higher acidity than regular copy paper, which causes it to resist standard laminating adhesive and makes it difficult to adhere to. To ensure adhesion, select a film with a stronger adhesive like professional-grade laminating film; it can also be used on documents with high ink coverage, as well as paper with a glossy finish like the stock used for posters or teaching aids. PRO film is also an excellent choice for professional printers and print shops. The additional benefit of using PRO versus standard is that PRO film activates at a lower temperature – saving energy and resulting in less heat damage to your print.
“I am laminating teslin [or permanent paper].” We highly recommend using DIGIKote laminating film for this type of project since it has an aggressive adhesive content and activates at the lowest temperature of all the thermal laminating films available. This results in better fusion between the teslin layer and the adhesive.
“I am laminating paper stock covered in oil-based ink toner.” Either DIGIKote or Nylon Xtreme Bond laminating film is the best option in this case. Nylon has the ability to lay flat, which allows film to be applied to only one side of a project using a single-sided laminator. Nylon Xtreme Bond has one of the strongest adhesives available and is validated by Xerox.
“I am laminating a vinyl car wrap.” Vinyl is a non-porous material, which does not marry well with thermal laminating films because the adhesive simply slides along its surface and has nothing onto which it can attach. Pressure-sensitive laminating film (also called “cold laminating film“) is ideal for non-porous materials like the vinyl that is used for magnets or car wraps since the film’s adhesive is self-sticking and requires no heat to activate. Furthermore, the cold laminating process won’t degrade heat-sensitive, solvent-based inks like thermal laminating can.
We’re happy to answer any specific questions you may have! Please ask us in the comment section, and we’ll give you a solution for your project.
Do you have cookbooks or notecards covered in whatever recipe is printed on them – literally?
Laminating recipe cards allows printed recipes to be used many times over without becoming as messy as a busy kitchen. Not only is it an excellent way for restaurants to preserve frequently-used recipes, but this method can be used at home, too! Recipes can be printed, handwritten, or clipped from a magazine or newspaper. After use, they can be easily wiped clean with a damp cloth and stored away for future use. Laminating your recipes also makes them far more durable so that they can be cherished for years to come.
The best way to laminate recipes is using Recipe Card Laminating Pouches (measuring 3-3/16” x 4-3/8”). If you prefer something larger, Letter Laminating Pouches (measuring 9″ x 11-1/2″) allow you to go from printer to pouch in no time at all. Home pouch laminators that are capable of laminating pouches 3 – 5 mil thick are available for less than $100; office pouch laminating machines are designed for use with pouches up to 10 mil and can accommodate considerably higher volumes of use.
For an even more professional and durable finish, combine a stack of laminated recipes with a single screw post or bind them together using a plastic binding comb or spiral binding coil to create a highly-customized mini cookbook!
Laminating film is offered in a variety of thicknesses, ranging from thin and flexible to thick and rigid. The term “mil” refers to total measurement of plastic and adhesive within one layer of laminating film, expressed in thousandths of an inch (0.001″).
Below is a list of common laminating film thicknesses as well as some examples of their common uses:
1.5 Mil (38.1 microns) – This thickness is commonly used in schools because it provides the most economical laminating solution: a large amount of film at a low price point.
1.7 Mil (43.2 microns) – Usually offered in professional-grade films, this thickness is used on material that needs to remain highly flexible; for example, map books are often laminated using 1.7 mil film.
3 Mil (76.2 microns) – This film thickness is extremely popular since it provides adequate protection for flexible objects that are infrequently handled, such as classroom posters.
5 Mil (127 microns) – The best way to describe 5 mil laminating film is to compare it to that of a restaurant menu. This thickness provides a sturdy base for printed material and can withstand moderate usage, yet can still be scored and folded if desired.
7 Mil (177.8 microns) – This thickness provides more strength and rigidity than 5 mil film. 7 mil laminating film is a popular thickness for laminating documents that are letter-sized or smaller, such as prayer cards.
10 Mil (254 microns) – In terms of thickness, documents laminated with 10 mil film are similar in rigidity to a credit card, and cannot be easily creased or bent. This thickness is extremely durable and can withstand frequent handling, which makes it perfect for projects like identification cards and luggage tags.
15 Mil (381 microns) – This thickness is sometimes used for textured, pressure-sensitive laminating film. It is so thick that it can even be used to protect graphics laminated to flooring for special events.
Laminating pouches come in 3, 5, 7, or 10 mil. The mil thickness of the pouch is listed per-side; the total thickness of the pouch is twice as thick as the listed thickness since the pouch is made up of two sheets of pre-cut laminating film sealed together along one edge.
To determine which thickness is the most appropriate for your application, ask yourself the questions below:
How frequently will this item be handled?
Items for temporary use or those that are not handled very often can be laminated using a minimal thickness, while those that are subjected to frequent handling or exposure require a thicker film.
Does this item need to be flexible or stiff?
Thin film like 1.5 mil simply coats documents with a light layer of plastic, allowing the material to retain its flexibility. Because thicker laminating films contain a more substantial layer of plastic, the resulting laminated documents are more rigid.
What are my machine’s capabilities?
Not all laminators are capable of laminating with the full range of available film thicknesses. Be sure to refer to your laminating machine’s specifications or ask an expert – like us! Home-use pouch laminators, like the entry-level models sold by Scotch or GBC, are often limited to using 3 mil and 5 mil laminating sheets. School roll laminators generally use 1.5 and 3 mil laminating film. If you need to laminate using thicker roll laminating film, you will need a more robust laminator.
We’d love to hear what your favorite thickness is for your projects! Or, if your project is not listed above, and you would like a recommendation as to which mil thickness is most suitable, please ask us within the comments section and we’ll give you a solution.
Document finishing is as easy as four steps: PRINT, TRIM, INSERT, LAMINATE.
Trimming a project prior to lamination saves time and creates a consistent, professional result, with only simple measurement skills required. The two most popular paper sizes worldwide are A4 and letter; both are very versatile and compatible with most home, office, and industrial printers.
ISO “A Series” Paper Sizes
The International Organization for Standardization (commonly referred to as ISO) has developed a mathematical method of cutting paper into universally-accepted sizes, which enforces an aspect ratio that simplifies print material scaling across paper sizes and general size consistency (ISO 216). All world countries except United States and Canada have adopted this standard.
“A” series paper begins with A0 size paper (841 mm x 1189 mm/33.1″ x 46.8″) and an area of one square meter (m2). The number after “A,” in this case “0,” indicates how many cuts are made to achieve the size; to clarify, sheet sizes get smaller as the number beside “A” increases since it corresponds to the total number of cuts made. The next size down or up can be calculated using the square root of 2, as the cutting process revolves around the principle of dividing one sheet into two when a cut is made.
Two identical A4 size sheets (210 mm x 297 mm/8.27″ x 11.69″) result when an A3 size sheet (297 mm x 420 mm/11.69″ x 16.54″) is cut in half along the longer dimension of the sheet. A4 sheets are most commonly used internationally. (As a frame of reference for readers in United States and Canada, A4 is slightly longer than a letter-sized sheet of paper, yet shorter than a legal-sized sheet.)
Working with Letter-Sized (8.5″ x 11″) Paper
Letter-sized paper is the standard document size used in the United States and Canada; although Mexico, the Phillipines, and some countries in South America adopted ISO paper size standards, these countries also use this popular size. Letter-sized paper is not only a cost effective choice for printing projects, but it is extremely versatile and works with most printers.
A simple straight-edge paper trimmer can transform a letter-sized sheet into three different rectangular sizes, with no more than two slices per page! Slicing once down the center of the page vertically results in two half-letter sheets. A second cut made across the shorter width of the half-letter sheet creates four identical quarter-letter sheets. A letter-sized sheet can also be divided into thirds vertically.
When letter-sized sheets are put together side-by-side on the 11″ edge, the total spread is equivalent to one sheet of 11″ x 17″ paper, which is commonly referred to as “tabloid” or “double letter”. If you were to cut a tabloid sheet of paper into two even halves, two letter-sized sheets would result (hence the term double letter).
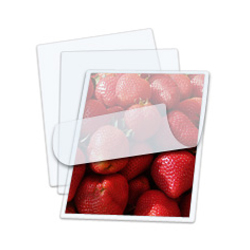
Laminating Pouches
Laminating pouches are sheets of laminating film pre-cut to desired dimensions with rounded die-cut corners. The last steps in the document finishing preparation process are inserting the trimmed document into the pouch, then running the pouch through a thermal laminator to seal it shut. It should be noted that an 1/8″ border around the edge of the inserted document ensures properly sealing inside the laminate.
The only equipment necessary outside of the printing process is a paper trimmer and pouch laminator – both being relatively inexpensive.
Lamination Depot carries laminating pouches in 350+ varieties, with dozens of sizes available as well as standard and specialty finishes. Letter laminating pouches are the most popular size and are available in 3 mil, 5 mil, 7 mil, and 10 mil thicknesses. These pouches ensure a clean, attractive 1/4″ border all the way around the document. Lamination Depot also offers a special “mini letter” pouch size, which creates a 1/8″ border around letter-sized paper for a tighter, more crisp finished look.
Lamination Depot’s menu-sized laminating pouches are also immensely popular. This series of sizes offers three different border thicknesses to surround a standard tabloid sheet of paper. Menu large offers a 1/2″ border, menu small offers a 1/4″ border, and mini menu offers a nearly invisible 1/8″ border.
Lamination Depot also carries A4 and A3 size in a variety of mil thicknesses, which are increasingly popular due to their no-trim-necessary convenience when used with international sheet sizes.
Impress clients and recipients with polished, preserved documents using this simple, four-step document finishing process!