“Why Won’t My Laminating Film Stick?”

Adhesives interact with paper and ink toner coverage differently. When selecting laminating film, it is important to note the film’s content ratio: when the ratio of film and adhesive are combined, they equal the film’s total thickness. Film that is made with stronger adhesive provides better adhesion, and often uses a lower melting temperature than more basic adhesives. A higher ratio of film to adhesive provides a thicker finished result and increased clarity compared to films that have a high adhesive content.

Below are some common scenarios with the recommended type of film to use for each:

“I am laminating standard copier paper with light ink coverage.” Standard 20 lb. copier paper is a porous material that can be laminated with standard laminating film, including the school-grade laminating rolls commonly used by schools. Light ink coverage, such as the amount used on text-based documents with simple illustrations, provides the best base for laminating with standard-grade film.

“We are a school that laminates construction paper projects.” Construction paper generally has higher acidity than regular copy paper, which causes it to resist standard laminating adhesive and makes it difficult to adhere to. To ensure adhesion, select a film with a stronger adhesive like professional-grade laminating film; it can also be used on documents with high ink coverage, as well as paper with a glossy finish like the stock used for posters or teaching aids. PRO film is also an excellent choice for professional printers and print shops. The additional benefit of using PRO versus standard is that PRO film activates at a lower temperature – saving energy and resulting in less heat damage to your print.

“I am laminating teslin [or permanent paper].” We highly recommend using DIGIKote laminating film for this type of project since it has an aggressive adhesive content and activates at the lowest temperature of all the thermal laminating films available. This results in better fusion between the teslin layer and the adhesive.

“I am laminating paper stock covered in oil-based ink toner.” Either DIGIKote or Nylon Xtreme Bond laminating film is the best option in this case. Nylon has the ability to lay flat, which allows film to be applied to only one side of a project using a single-sided laminator. Nylon Xtreme Bond has one of the strongest adhesives available and is validated by Xerox.

“I am laminating a vinyl car wrap.” Vinyl is a non-porous material, which does not marry well with thermal laminating films because the adhesive simply slides along its surface and has nothing onto which it can attach. Pressure-sensitive laminating film (also called “cold laminating film“) is ideal for non-porous materials like the vinyl that is used for magnets or car wraps since the film’s adhesive is self-sticking and requires no heat to activate. Furthermore, the cold laminating process won’t degrade heat-sensitive, solvent-based inks like thermal laminating can.

We’re happy to answer any specific questions you may have! Please ask us in the comment section, and we’ll give you a solution for your project.
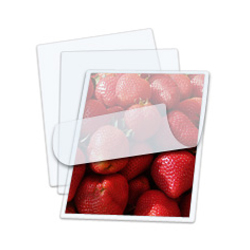
Create Your Own “Splatterproof” Recipe Cards!

Do you have cookbooks or notecards covered in whatever recipe is printed on them – literally?

Laminating recipe cards allows printed recipes to be used many times over without becoming as messy as a busy kitchen. Not only is it an excellent way for restaurants to preserve frequently-used recipes, but this method can be used at home, too! Recipes can be printed, handwritten, or clipped from a magazine or newspaper. After use, they can be easily wiped clean with a damp cloth and stored away for future use. Laminating your recipes also makes them far more durable so that they can be cherished for years to come.

The best way to laminate recipes is using Recipe Card Laminating Pouches (measuring 3-3/16” x 4-3/8”). If you prefer something larger, Letter Laminating Pouches (measuring 9″ x 11-1/2″) allow you to go from printer to pouch in no time at all. Home pouch laminators that are capable of laminating pouches 3 – 5 mil thick are available for less than $100; office pouch laminating machines are designed for use with pouches up to 10 mil and can accommodate considerably higher volumes of use.

For an even more professional and durable finish, combine a stack of laminated recipes with a single screw post or bind them together using a plastic binding comb or spiral binding coil to create a highly-customized mini cookbook!

Understanding Laminating Film Thicknesses

Laminating film is offered in a variety of thicknesses, ranging from thin and flexible to thick and rigid. The term “mil” refers to total measurement of plastic and adhesive within one layer of laminating film, expressed in thousandths of an inch (0.001″).

Below is a list of common laminating film thicknesses as well as some examples of their common uses:

  • 1.5 Mil (38.1 microns) – This thickness is commonly used in schools because it provides the most economical laminating solution: a large amount of film at a low price point.
  • 1.7 Mil (43.2 microns) – Usually offered in professional-grade films, this thickness is used on material that needs to remain highly flexible; for example, map books are often laminated using 1.7 mil film.
  • 3 Mil (76.2 microns) – This film thickness is extremely popular since it provides adequate protection for flexible objects that are infrequently handled, such as classroom posters.
  • 5 Mil (127 microns) – The best way to describe 5 mil laminating film is to compare it to that of a restaurant menu. This thickness provides a sturdy base for printed material and can withstand moderate usage, yet can still be scored and folded if desired.
  • 7 Mil (177.8 microns) – This thickness provides more strength and rigidity than 5 mil film. 7 mil laminating film is a popular thickness for laminating documents that are letter-sized or smaller, such as prayer cards.
  • 10 Mil (254 microns) – In terms of thickness, documents laminated with 10 mil film are similar in rigidity to a credit card, and cannot be easily creased or bent. This thickness is extremely durable and can withstand frequent handling, which makes it perfect for projects like identification cards and luggage tags.
  • 15 Mil (381 microns) – This thickness is sometimes used for textured, pressure-sensitive laminating film. It is so thick that it can even be used to protect graphics laminated to flooring for special events.

Laminating pouches come in 3, 5, 7, or 10 mil. The mil thickness of the pouch is listed per-side; the total thickness of the pouch is twice as thick as the listed thickness since the pouch is made up of two sheets of pre-cut laminating film sealed together along one edge.

To determine which thickness is the most appropriate for your application, ask yourself the questions below:

How frequently will this item be handled?

Items for temporary use or those that are not handled very often can be laminated using a minimal thickness, while those that are subjected to frequent handling or exposure require a thicker film.

Does this item need to be flexible or stiff?

Thin film like 1.5 mil simply coats documents with a light layer of plastic, allowing the material to retain its flexibility. Because thicker laminating films contain a more substantial layer of plastic, the resulting laminated documents are more rigid.

What are my machine’s capabilities?

Not all laminators are capable of laminating with the full range of available film thicknesses. Be sure to refer to your laminating machine’s specifications or ask an expert – like us! Home-use pouch laminators, like the entry-level models sold by Scotch or GBC, are often limited to using 3 mil and 5 mil laminating sheetsSchool roll laminators generally use 1.5 and 3 mil laminating film. If you need to laminate using thicker roll laminating film, you will need a more robust laminator.

We’d love to hear what your favorite thickness is for your projects! Or, if your project is not listed above, and you would like a recommendation as to which mil thickness is most suitable, please ask us within the comments section and we’ll give you a solution.

4 Easy Steps to Document Finishing with Simple Paper Trimming and Pre-Cut Laminating Pouches

Document finishing is as easy as four steps: PRINT, TRIM, INSERT, LAMINATE.

Trimming a project prior to lamination saves time and creates a consistent, professional result, with only simple measurement skills required. The two most popular paper sizes worldwide are A4 and letter; both are very versatile and compatible with most home, office, and industrial printers.

Laminating Pouches from Lamination Depot

ISO “A Series” Paper Sizes

The International Organization for Standardization (commonly referred to as ISO) has developed a mathematical method of cutting paper into universally-accepted sizes, which enforces an aspect ratio that simplifies print material scaling across paper sizes and general size consistency (ISO 216). All world countries except United States and Canada have adopted this standard.

“A” series paper begins with A0 size paper (841 mm x 1189 mm/33.1″ x 46.8″) and an area of one square meter (m2). The number after “A,” in this case “0,” indicates how many cuts are made to achieve the size; to clarify, sheet sizes get smaller as the number beside “A” increases since it corresponds to the total number of cuts made. The next size down or up can be calculated using the square root of 2, as the cutting process revolves around the principle of dividing one sheet into two when a cut is made.

Two identical A4 size sheets (210 mm x 297 mm/8.27″ x 11.69″) result when an A3 size sheet (297 mm x 420 mm/11.69″ x 16.54″) is cut in half along the longer dimension of the sheet. A4 sheets are most commonly used internationally. (As a frame of reference for readers in United States and Canada, A4 is slightly longer than a letter-sized sheet of paper, yet shorter than a legal-sized sheet.)

Working with Letter-Sized (8.5″ x 11″) Paper

Letter-sized paper is the standard document size used in the United States and Canada; although Mexico, the Phillipines, and some countries in South America adopted ISO paper size standards, these countries also use this popular size. Letter-sized paper is not only a cost effective choice for printing projects, but it is extremely versatile and works with most printers.

A simple straight-edge paper trimmer can transform a letter-sized sheet into three different rectangular sizes, with no more than two slices per page! Slicing once down the center of the page vertically results in two half-letter sheets. A second cut made across the shorter width of the half-letter sheet creates four identical quarter-letter sheets. A letter-sized sheet can also be divided into thirds vertically.

When letter-sized sheets are put together side-by-side on the 11″ edge, the total spread is equivalent to one sheet of 11″ x 17″ paper, which is commonly referred to as “tabloid” or “double letter”. If you were to cut a tabloid sheet of paper into two even halves, two letter-sized sheets would result (hence the term double letter).

Laminating Pouches

Laminating pouches are sheets of laminating film pre-cut to desired dimensions with rounded die-cut corners. The last steps in the document finishing preparation process are inserting the trimmed document into the pouch, then running the pouch through a thermal laminator to seal it shut. It should be noted that an 1/8″ border around the edge of the inserted document ensures properly sealing inside the laminate.

The only equipment necessary outside of the printing process is a paper trimmer and pouch laminator – both being relatively inexpensive.

Lamination Depot carries laminating pouches in 350+ varieties, with dozens of sizes available as well as standard and specialty finishes. Letter laminating pouches are the most popular size and are available in 3 mil5 mil7 mil, and 10 mil thicknesses. These pouches ensure a clean, attractive 1/4″ border all the way around the document. Lamination Depot also offers a special “mini letter” pouch size, which creates a 1/8″ border around letter-sized paper for a tighter, more crisp finished look.

Among the vast selection of laminating sheets that Lamination Depot carries are convenient 1/2 letter laminating pouches1/4 letter laminating pouches, and 1/3 letter laminating pouches, all of which feature the clean 1/4″ outer border that is created with standard letter-sized pouches.

Lamination Depot’s menu-sized laminating pouches are also immensely popular. This series of sizes offers three different border thicknesses to surround a standard tabloid sheet of paper. Menu large offers a 1/2″ border, menu small offers a 1/4″ border, and mini menu offers a nearly invisible 1/8″ border.

Lamination Depot also carries A4 and A3 size in a variety of mil thicknesses, which are increasingly popular due to their no-trim-necessary convenience when used with international sheet sizes.

Impress clients and recipients with polished, preserved documents using this simple, four-step document finishing process!

An Overview of Pressure-Sensitive Lamination: Versatile Film for Heat-Sensitive Prints

Lamination is one of the most popular and effective ways to protect and preserve prints of all sizes, from offset-printed business cards to large, digitally-printed posters. Though thermal lamination is the most frequently used style of lamination, not all printing methods or material types can stand up to the intense heat required to melt the thermal adhesive. For heat-sensitive media and inks, pressure-sensitive laminating film an excellent solution – providing the protective properties of thermal lamination without requiring any heat. In this post, we share an overview of pressure-sensitive lamination and learn more about its unique benefits.

The Basics

Pressure-sensitive laminating film, also called cold laminating film, is specially designed film that uses pressure instead of heat in order to activate the adhesive and apply the film to the document. Because pressure-sensitive lamination does not require heat, it is an ideal choice for items printed using inkjet, electrostatic, laser, thermal transfer, or dye sublimation printing systems, which can degrade when exposed to high temperatures. 

Cold laminating film has a factory-applied release liner on the backside, which prevents the film from sticking to itself on the roll. Not all roll laminators are capable of laminating using pressure-sensitive film, but those that are also include an additional roller that removes and winds the release liner as film is applied to the print.

Pressure-sensitive laminating film is made with solvent-based adhesives, which offer improved adhesion strength when compared to water-based adhesives. Furthermore, digital prints are known for being difficult to adhere to, which makes the aggressive adhesives used in cold laminating film an excellent choice for use with digitally-printed items. Like thermal laminating filmcold lamination rolls are available in a range of thicknesses and finishes, including matte, satin, and gloss. They are also offered in both UV-resistant and scratch-resistant (polycarbonate) varieties.

In Review

If your organization works primarily with digitally-printed materials (or uses other heat-sensitive inks or media), then pressure-sensitive lamination can provide the adhesion that you need without the damaging effects of heat. Although the cold lamination process requires specialized equipment and costs more than comparable thermal films, the investment is well worth it when compared with the potential cost of printed materials ruined by exposure to heat.

Decorative Laminating Pouches: An Easy Way to Add Pizzazz to Your Laminating Projects!

Laminating is one of the most popular and effective ways to protect and preserve documents of practically any size, from ID badges and photographs to in-store signage and award certificates. While most documents are laminated using clear laminating pouches, there is a vast array of bright and colorful decorative laminating pouches that can be used to enhance your documents. In this post, we learn more about decorative laminating pouches and share an overview of some of the exciting styles that are available.

Framed Laminating Pouches
Colored Laminating Pouches

The Basics

Like all thermal laminating pouches, decorative laminating pouches use heat to create a seal. To laminate a document using a decorative laminating pouch, simply open the pouch, insert your document so that it is centered within the pouch, and feed it through your pre-heated pouch laminator (using a carrier if required – refer to the instruction manual for your laminator for specific information). As the pouch passes through the machine, the adhesive inside melts and fuses with the document. The outer edges of the pouch create a seal that helps to protect the document from moisture and other elements.

There are two main styles of decorative laminating pouches – colored pouches and framed pouches. Colored laminating pouches are made up of one layer of clear laminating film and one layer of colored film. The clear layer is placed on top of the document so that the information shows through, while the exposed portion colored layer (which appears around the outer edge of your sheet) creates an accent border. Though the colored film layer is somewhat translucent, attempting to use it on top of the printed portion of your document would reduce the clarity of any text. Framed laminating pouches are made from two layers of clear laminating film, one of which has an image printed along the outside border of the top layer. Available themes range from professional-looking certificate borders and wood textures to festive birthday greetings and happy faces.

Both colored laminating pouches and framed laminating pouches are available in a few different sizes as well as a variety of colors and/or themes. While decorative pouches do create make laminated documents stand out more than traditional clear pouches, their price point is a bit higher than comparable clear pouches and there are fewer size variations.

Uses

Decorative laminating pouches have a wide variety of uses for both personal and professional applications. For the home user, they’re an excellent way to preserve favorite photographs for scrapbooks or photo albums, to add color to child’s school report or presentation, to make custom placemats for kids, and much more. In the office, they can be used for color-coded event badges, signage (both to promote sales to customers and for internal use), pricelists (i.e. red for wholesale, blue for retail), training materials, and much more. Individuals and organizations that already own a laminator will find decorative pouches to be an affordable way to make laminated documents stand out even more.

In Review

Decorative laminating pouches are an easy and effective way to make a bold and colorful statement on your next laminating project. From professional applications like color-coded ID badges and eye-catching signs and displays to personal projects like scrapbooking and crafting, decorative laminating pouches offer almost limitless possibilities. While they work exactly the same as clear thermal laminating pouches, decorative pouches are a bit more expensive and come in fewer sizes. However, the added impact of either a colorful background or an ornate frame makes decorative laminating pouches a popular choice for organizations and individuals alike.

Determining the Best Laminating Pouch Size for Your Document

Lamination Depot offers laminating pouches in hundreds of unique sizes to accommodate the most popular insert document sizes. Because laminating pouches need to be larger than the insert document in order to achieve a proper seal, there are a few guidelines that should be followed to help determine the most appropriate size for your document.

A minimum border of 1/8″ is required on all sizes of your document in order for the pouch to seal properly. The easiest way to determine the ideal laminating pouch size for your insert is to simply measure the document and then add 1/4″ to both the length and the height. The resulting measurements will represent the appropriate laminating pouch size for your insert. If your insert document is a standard size (such as a letter-sized sheet or a business card), then you will likely find a pouch that is designed to be an exact fit.

Even if your document is an unusual size, it is still somewhat likely that you will find a standard pouch size that will work. Although you cannot have a margin of less than 1/8″ between the edges of your pouch and the edges of your insert document, having a larger margin will not cause any problems. You can choose to leave the larger border intact or trim it down to 1/8″ using a paper cutter or a pair of scissors. If the pouch that you are using is substantially larger than your insert document, then you may notice small bubbles forming in the areas where the layers of excess film meet (which is why it is important to use the pouch size that most closely matches your document).

If you plan on using pre-slotted laminating pouches (or will be using a manual slot punch to add slots after lamination), then you will need to increase the margin to account for the slot. A standard slot is 1/8″ tall, and a 1/8″ margin is required above and below the slot itself, bringing the required margin to 3/8″ for the slotted portion. When you add this to the 1/8″ margin that is required on the edge opposite the slot, your pouch will need to be 1/2″ larger than the insert document on the slotted side (and will need to be the standard 1/4″ on the side without the slot).

Nylon Xtreme Bond Laminating Film: Aggressive Adhesion for Digital Prints

As we’ve covered in previous posts, single-sided laminating is a great way to protect book covers, posters, maps, and other projects that need to be preserved on the front side while remaining untreated on the back side. Nylon laminating film is specifically designed to work in conjunction with your single-sided laminator to reduce curling for superior results. Traditionally, nylon laminating film has been offered with standard adhesion strength, but some projects require a more aggressive adhesive. That’s where nylon Xtreme Bond laminating film comes in. This ultra-sticky film provides the same curl-resistant properties as standard nylon film, but with a specialized adhesive formulation that adheres to difficult-to-stick-to prints. In this post, we take a closer look at nylon Xtreme Bond laminating film.

The Basics

Nylon Xtreme Bond laminating film is available in widths ranging from 12.5″ to 19.5″ on 3,000′ rolls. The film is a thin and pliable 1.2 mil thickness, which makes it an ideal choice for making paper book covers. Because it is designed to be used with a single-sided laminating machine, it is only available on a 3″ core.Nylon Xtreme Bond film is available in both gloss and matte finishes (matte is available by special order), both of which offer superior abrasion resistance as well as water-, oil-, acid-, and alkali-resistant properties.

Uses

The superior adhesives bond well with digital prints – including digital output from Xerox Docutech and Docucolor machines, Nexpress, and Xeikon Systems – and the film carries an official validation from the Xerox Finishing Lab. It is capable of adhering to fuser oil-based inks, digital toners, and even “wet” inks. Xtreme Bond film can even be die-cut for specialty applications.

In Review

Using nylon laminating film is a must if you want great results on your single-sided laminating projects, but most standard nylon films do not offer the adhesion strength that is required for working with digital prints. If you have a need to perform single-sided lamination on digital prints (or other difficult-to-adhere-to media, such as those printed with oil-based inks), then nylon Xtreme Bond laminating film is an excellent solution. It offers all of the same benefits as traditional nylon film – including curl-resistance, abrasion-resistance, and the ability to be die-cut – but also features a specially-formulated adhesive that tames most toners and inks. In conjunction with your single-sided laminator, nylon Xtreme Bond laminating films will transform your digitally-printed posters, book covers, maps, displays, and other projects into durable documents that will stand up to years of use.

An Overview of Single-Sided Lamination

Single-sided lamination has a variety of applications, ranging from book covers and posters to photographic prints and maps. While many people think that single-sided lamination can be achieved by simply loading only one roll of film onto a standard, two-sided laminator, the fact is that one-sided lamination is a unique process that requires specially-designed film and equipment. In this post, we take a closer look at single-sided lamination to learn what separates it from double-sided thermal lamination.

The Basics

When you use a laminator for two-sided lamination, each of the sides is applying tension to the laminated document. Since the two sides apply tension in opposing directions, your document will lay flat. Because documents laminated on only one side aren’t able to rely on the opposing tensions in order to keep the document from curling, specialized laminating film must be used in conjunction with a single-sided laminator in order to counteract the curl. Single-sided laminating machines feature decurling bars (also called “anti-curling bars”), which the laminated documents feed through before they exit the machine. These bars help to flatten out any minor curls that occur during lamination, and are found exclusively on single-sided laminating machines.

Nylon “Lay-Flat” Laminating Film

Also called “lay-flat” laminating film, nylon laminating film is specifically designed for single-sided applications. The adhesive used on lay-flat laminating film has a lower melting temperature than the adhesive used on standard laminating film (210-230 degrees F compared to 290 degrees F), which helps to reduce curling. Nylon also shrinks less during cooling than polyester, which is yet another feature designed to reduce curls in your laminated documents. Nylon laminating film is water-, oil-, acid-, and alkali-resistant, can be foil-stamped, printed, or glued, and can even be die cut. It is most commonly sold in a 1.2 mil thickness and on a 3″ core, with widths varying between 12.5″ and 19.5″.

Problems with Using Your Two-Sided Laminator for Single-Sided Lamination

Aside from the curling issues mentioned earlier in this post, there are a number of problems that can occur when a two-sided laminator is used for single-sided lamination. If you load only one roll of film onto your laminator, any excess film that extends past the width of your document will leave adhesive residue behind on the other roller (which can even cause the film to wrap around the roller entirely – a messy and time-consuming clean-up). When you have film loaded onto both sides, the film on the bottom protects the bottom roller from the excess film on the top roller, and vice versa. Furthermore, nylon laminating film is sold on a 3″ core, while most non-commercial laminators use 1″ core film. As a result, most double-sided thermal laminators aren’t capable of using the lay-flat film required for single-sided lamination.

In Review

Single-sided lamination is popular in a number of industries, because it protects one side of a document while leaving the other side bare for additional processes (such as book-binding or mounting). Contrary to popular belief, single-sided lamination is actually a distinct and separate process from two-sided lamination, and requires the use of specialized nylon laminating film and a single-sided laminator. If you have a need to perform single-sided lamination on a regular basis, then investing in the proper equipment and supplies is a must, because using a double-sided laminator will not give you the results that you are looking for (and can ultimately cause damage to your machine).

Machineless Lamination: The Benefits of Self-Adhesive Laminating Pouches

Also called self-laminating, self-sealing, or cold laminating pouches, self-adhesive laminating pouches are made with specialized laminating film that does not use thermally-activated adhesive. Because they do not require the use of heat, self-laminating pouches can be sealed without a machine, making them an ideal choice for small laminating projects or for laminating documents in the field (without access to electricity). In this post, we’ll take a closer look at self-sealing laminating pouches and learn more about the unique benefits they offer.

The Basics

Unlike thermal laminating pouches, self-adhesive pouches do not need to be run through a pouch laminator in order to achieve a proper seal (although some machines feature a cold lamination setting that can aid in sealing the pouch, which is useful but not required). They do have a few similarities to thermal pouches, in that they require a border around the outer edge of the document to create a seal and that once the film is applied to the document it cannot be removed.

To apply a self-laminating pouch to your document, begin by placing your document face down in the pouch with the adhesive side on the top. Once the document is positioned properly, slowly roll the adhesive side onto the insert document, peeling the paper backing off as you go. Press the air bubbles out of the pouch using your finger tips, then press firmly around all edges to create a seal.

Benefits of Self-Adhesive Laminating Pouches

Laminating is an extremely popular and versatile way to protect and preserve documents of all types, but not every laminating project is worth investing in a laminator. If you’re only laminating a small number of items and don’t already own a thermal pouch laminator, then you’ll probably find that cold laminating pouches are the most economical option for your needs. In addition to being a machineless method of lamination, they are often sold in smaller quantites than thermal pouches, so they’re ideal for short runs. The per-pouch cost of self-sealing pouches is considerably more than that of standard pouches, but they’re still very reasonably priced (especially when compared to the cost of a laminator).

Another benefit of self-laminating pouches is that they’re easy to use and safe for all ages. They don’t rely on heat, so they’re an excellent choice for classroom use or other projects with children. They’re also great for on-site laminating, since transporting a pouch laminator is not always possible. Field representatives can laminate membership cards, product literature, or other business materials just about anywhere, without having to find an outlet or wait for the machine to warm up. Finally, cold pouches work well with heat-sensitive items (such as photographs) that could be damaged during the thermal laminating process.

In Review

Self-sealing pouches are a simple and effective way to laminate your documents without a laminator. Although they cost a bit more than standard pouches, they are an excellent option for small laminating projects because they don’t require the additional investment of a laminating machine. They’re also more portable than thermal pouches and safe for all ages, since there’s no heat or electricity involved in the laminating process. If you’re looking for a way to preserve and protect a few of your most important documents and photographs, create a set of personalized luggage tags, make identification badges to help represent your company at an upcoming event, or any other short run laminating project, then be sure to take a look at self-adhesive laminating pouches.